
Dessert
HYDRANGEA CAKES
HYDRANGEA CAKES
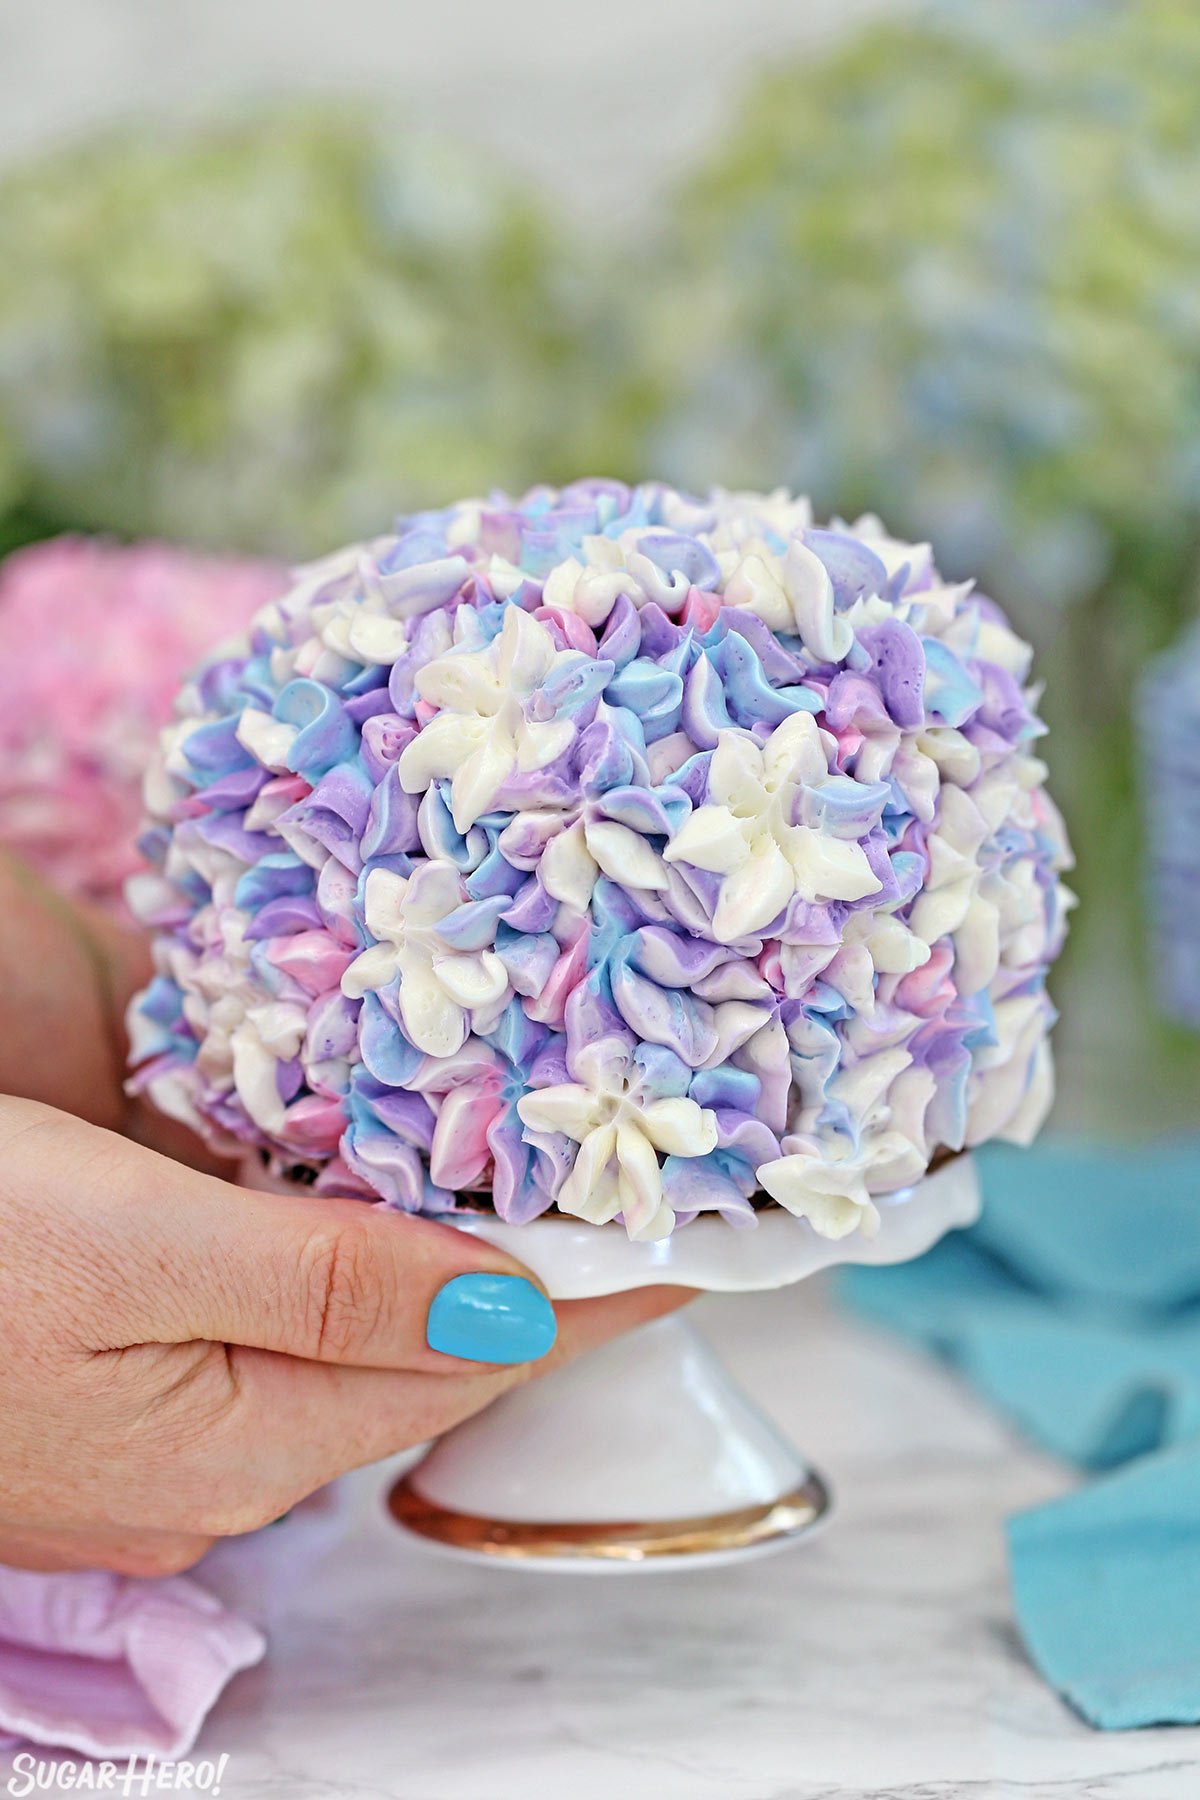
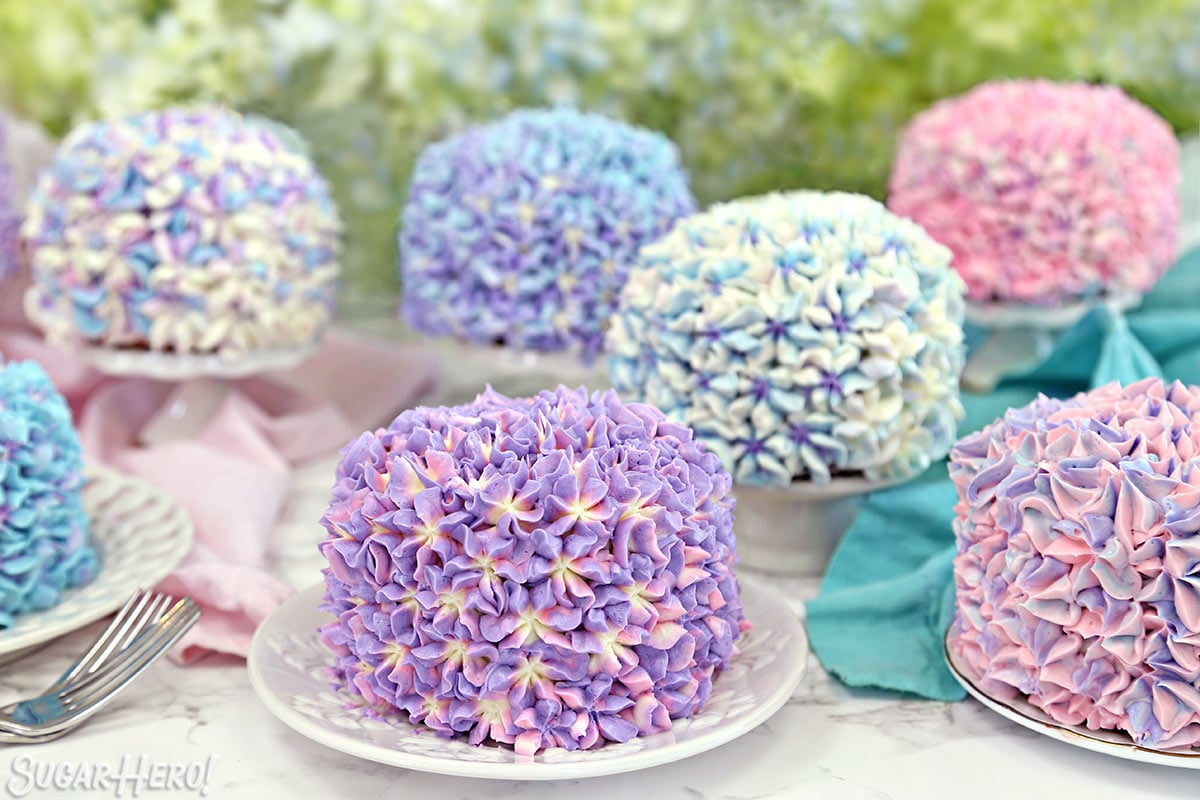
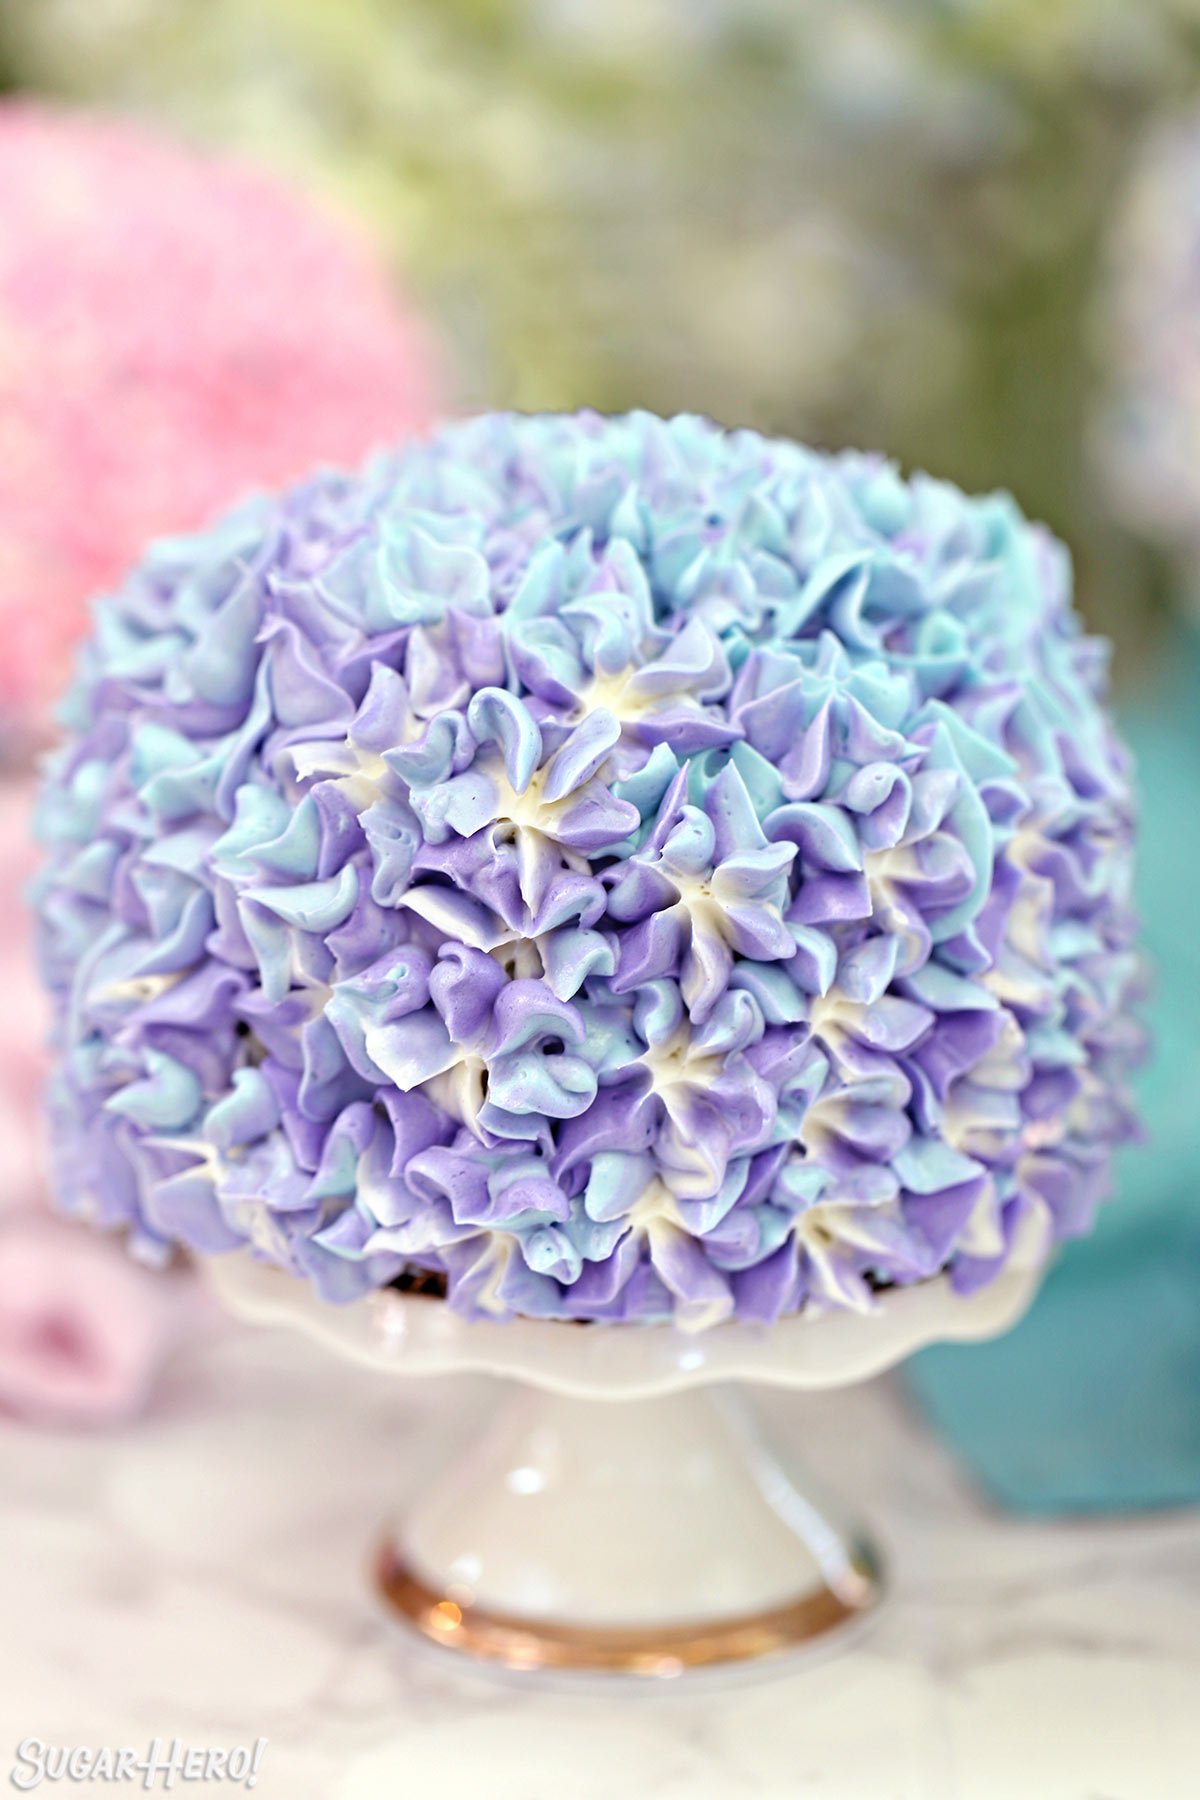
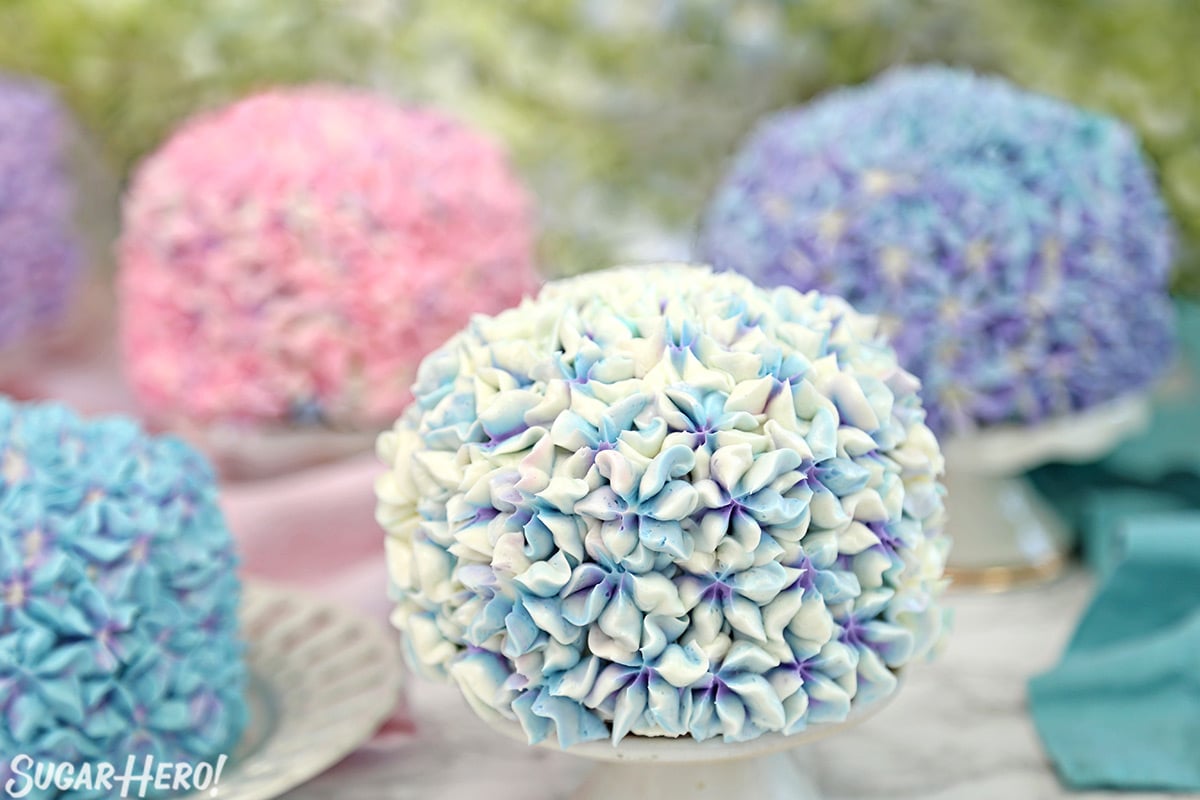
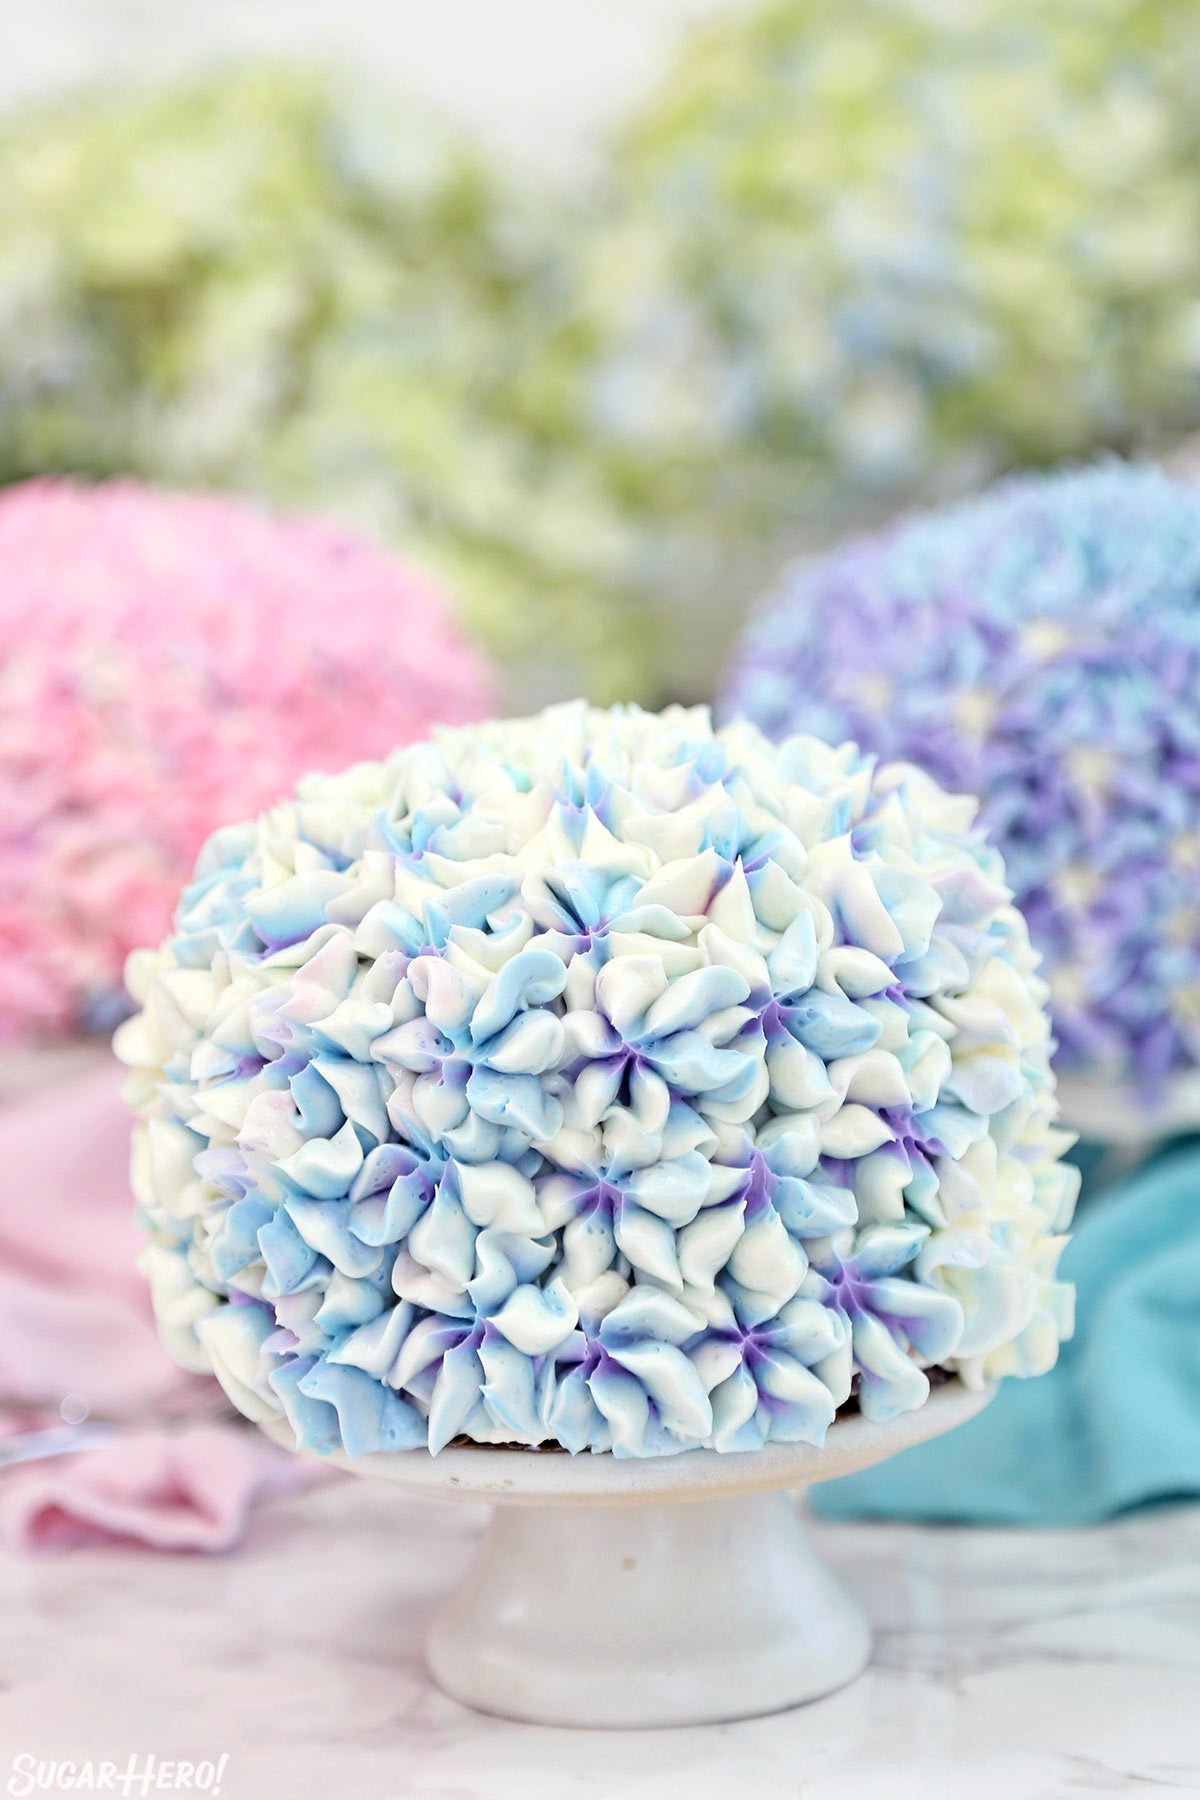
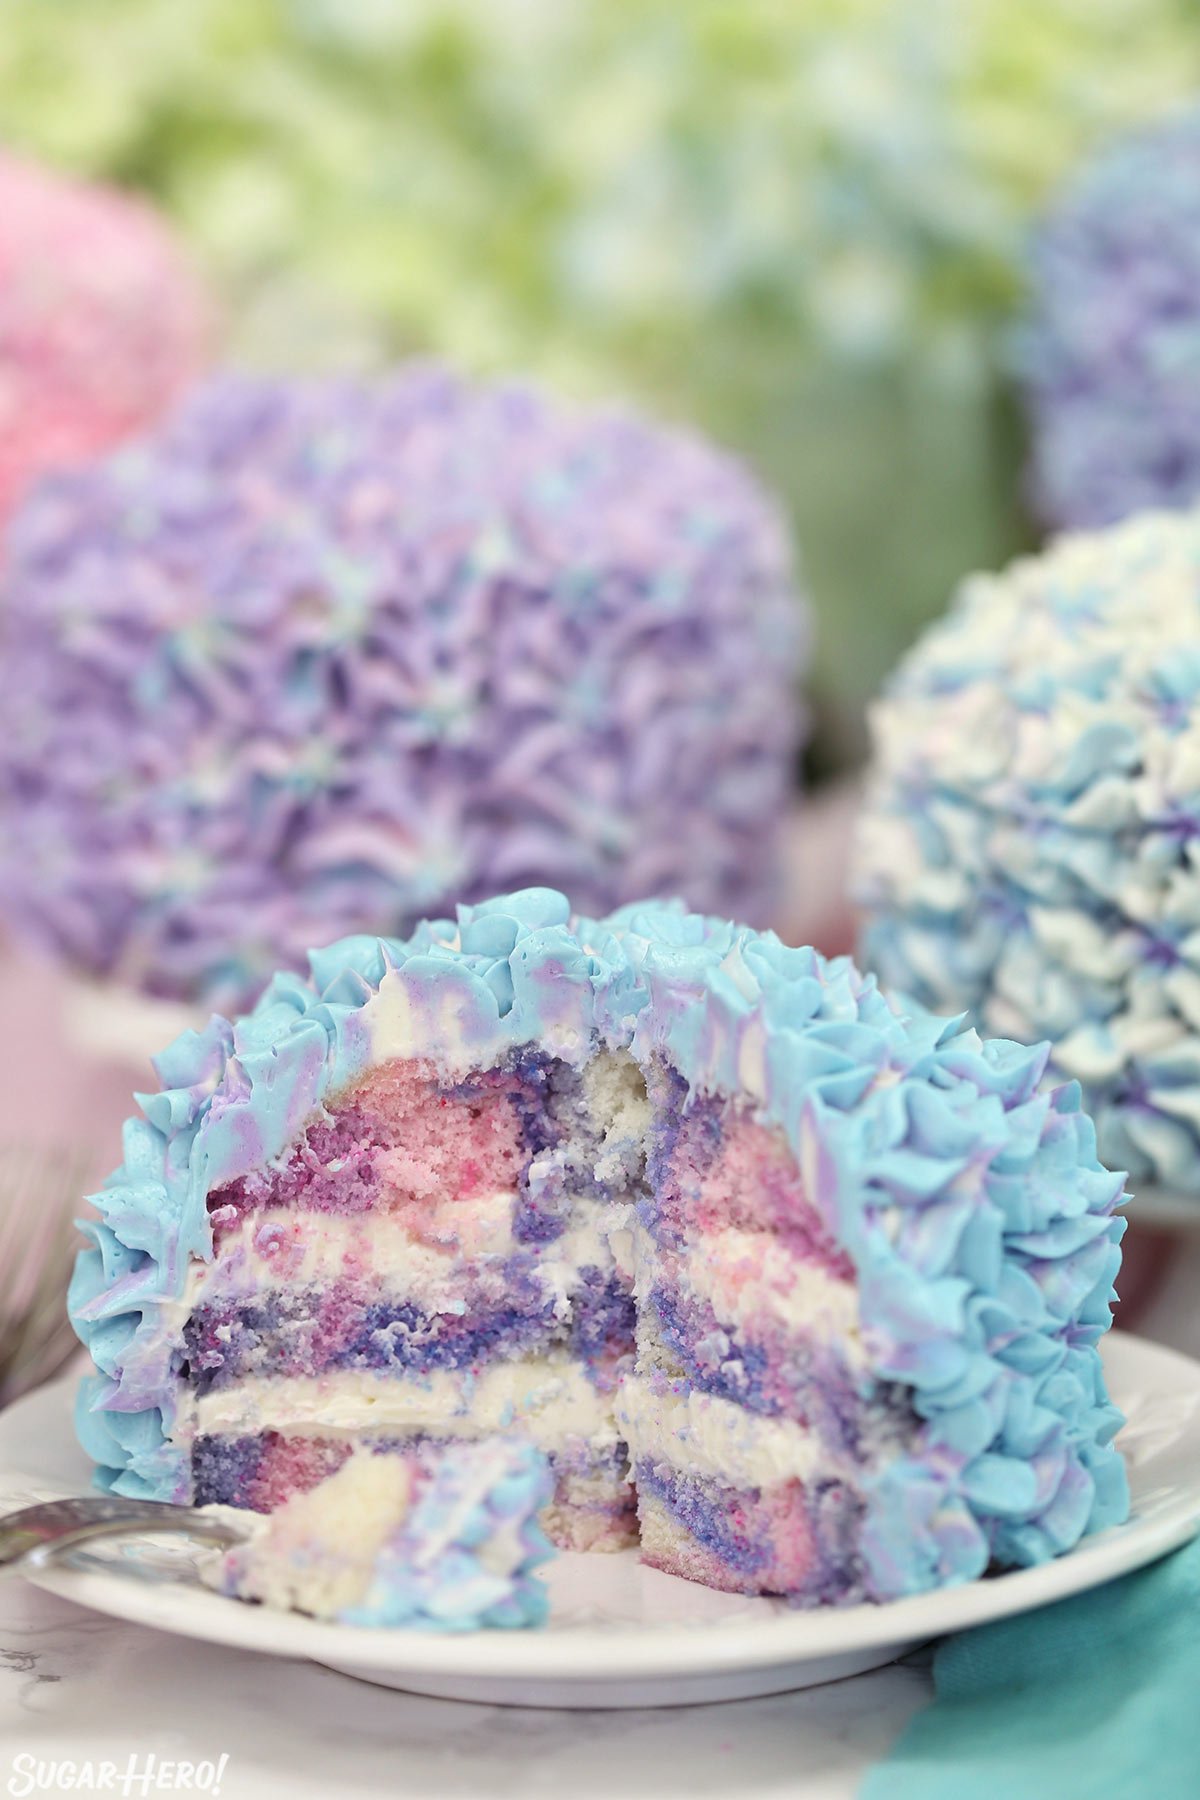
These Hydrangea Cakes are gorgeous miniature cakes that look like hydrangea flowers! You’ll be surprised to learn how easy it is to make the pretty, colorful blossom design on the outside. The inside is beautiful, too, with swirls of multicolored cake!
This year is FLYING by. I can’t believe spring is almost over already. (And more importantly, I can’t believe it’s almost summer vacation and my boys—husband and son alike—will soon be out of school and home all day. Hold me!)
All of that is to say, I have several “springy” projects I’ve already made—and a few more I’m planning on—and I have to hustle to share them before it’s old news and we’re all watermelon and pool party obsessed!
LET'S BE DESSERT BESTIES!
Honestly, though, even if I shared these in the dead of winter, I still think these hydrangea cakes would be appropriate. They’re too pretty, too eye-catching, too happy-making (yeah, that’s a thing I just made up) to go out of style.
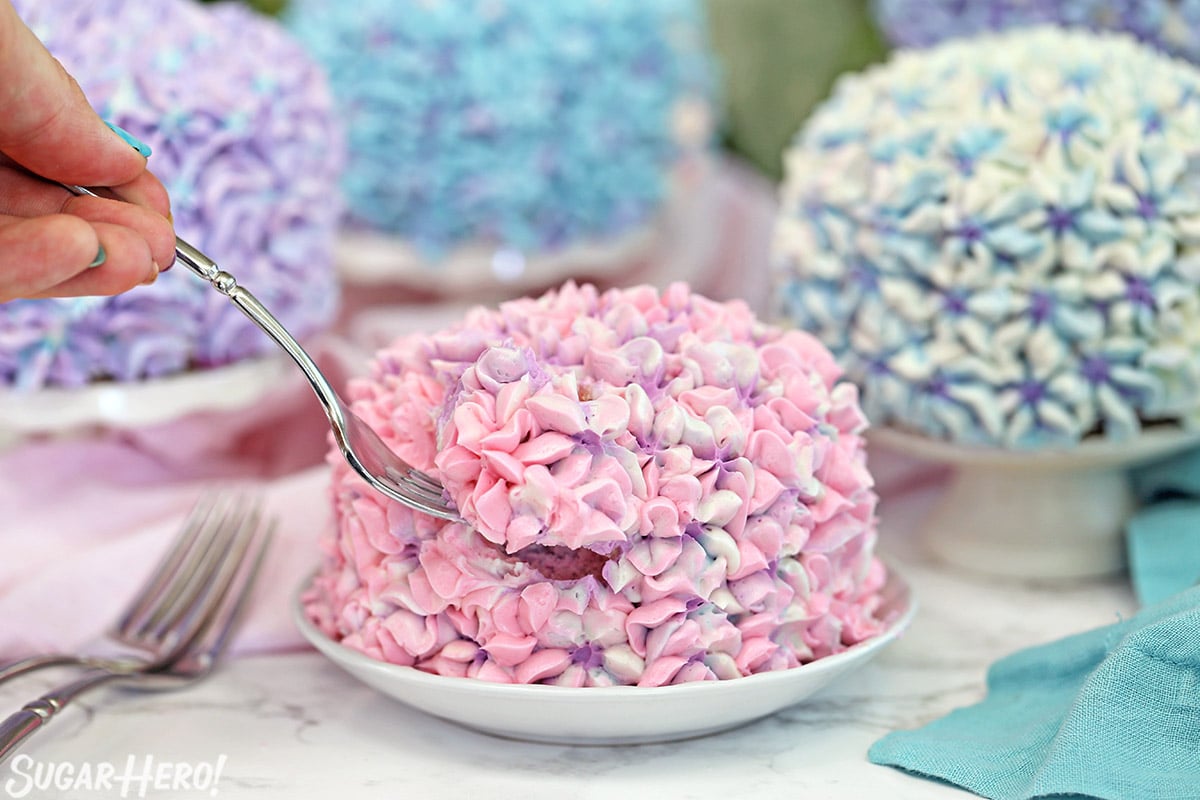

Isn’t that interior view lovely? I had so much fun mixing up both the inside and outside colors. You don’t have to go whole hog and do the cake batter swirls, but as long as you’re getting the food coloring out, why not, eh?
Finally, you don’t need to do mini cakes like this. Not everyone is a weird cake pan hoarder like me, with lots of mini cake pans, so you can definitely do these as an 8- or 9-inch cake. (In fact, someone in the Facebook group did just that, and shared the prettiest picture of her large hydrangea cake!)
I hope you’ll give these a try, and if you do, I hope you’ll share a picture too. Now get out there and enjoy the rest of spring before summer hits!
Hydrangea Cakes
These Hydrangea Cakes are gorgeous miniature cakes that look like hydrangea flowers! You’ll be surprised to learn how easy it is to make the pretty, colorful blossom design on the outside. The inside is beautiful, too, with swirls of multicolored cake!
Course Dessert
Dessert Type Cake
Prep Time 2 hours
Cook Time 35 minutes
Total Time 2 hours 35 minutes
Servings 12
Author Elizabeth LaBau
Ingredients
For the Cakes:
- 10 1/2 oz granulated sugar , (1 1/2 cups)
- 10 1/2 oz cake flour , (2 2/3 cups)
- 1 tbsp + 1 tsp baking powder
- 3/4 tsp salt
- 4 fl oz egg whites , (see Note below)
- 1 cup milk
- 1 TBSP vanilla extract
- 6 oz unsalted butter , at room temperature
- Gel food coloring , (I used Americolor electric purple, regal purple, sky blue, and soft pink)
For the Buttercream:
- 6 fl oz pasteurized liquid egg whites , (3/4 cup)
- 24 oz powdered sugar , (6 cups)
- ½ tsp salt
- 24 oz unsalted butter , at room temperature
- 2 TBSP vanilla extract
- Gel food coloring , (I used Americolor electric purple, regal purple, sky blue, and soft pink)
Instructions
To Make the Cakes:
- Preheat the oven to 350 F. Line six 4-inch cake pans with parchment rounds, and spray the parchment and pan sides with nonstick cooking spray. (Note that you can make these cakes in different sizes depending on what size pans you have. If you make larger cakes, just extend the baking time and watch them closely.)
- Combine the sugar, cake flour, baking powder, and salt in the bowl of the stand mixer fitted with a paddle attachment. Mix on low speed for about a minute to combine the dry ingredients.
- Lightly whisk together the egg whites together with a quarter of the milk and the vanilla extract, and set aside for now.
- Add the remaining ¾ cup milk and the softened butter to the large mixing bowl and mix on low speed until the dry ingredients are moistened. Turn the mixer to medium speed and mix for a minute and a half.
- Add the egg white mixture in three batches, mixing for 20-30 seconds after each addition, until you have a smooth batter. Scrape the bottom and sides of the bowl with a rubber spatula, and give the batter a few more stirs to make sure everything is incorporated. Divide the batter into 4 even portions, and color one purple, one blue, and one pink. Leave one portion white.
- Use a spoon to scoop spoonfuls of the batters and plop them in a random pattern in the prepared cake pans. Fill them about halfway full—each pan should have about 7 oz of batter. Bake the cakes at 350 F for 30-35 minutes, until the sides just start pulling away from the pan, and a toothpick inserted into the center comes out clean.
- Let the cakes cool on a wire rack for 10 minutes, then gently turn them out and let them cool completely. I find it’s easiest to cut and stack cakes that have been chilled, so if you have time, wrap them with plastic wrap and put them in the freezer for at least 30 minutes, until they are firm but not frozen all the way through. If you are making these in advance, they can stay in the freezer for up to several weeks. Let them partially defrost, until they are firm but not rock-hard, before assembling.
To Make the Buttercream:
- Combine the whites, powdered sugar, and salt in the bowl of a large stand mixer fitted with a paddle attachment. Mix everything together on low speed, until the sugar is moistened and no dry patches remain. Turn off the mixer, scrape down the sides and bottom of the bowl with a spatula, then turn the mixer to medium speed. Beat on medium for 5 minutes.
- After 5 minutes, turn the mixer to medium-low and start adding the softened room temperature butter, 1-2 tablespoons at a time. Once all of the butter is incorporated, add the vanilla extract and mix it in. Stop the mixer and scrape down the bottom and sides once more. Turn the speed to medium and beat the buttercream for 10 minutes. At the end, you’ll have a frosting with a wonderfully light and creamy texture.
To Assemble and Decorate:
- Place the cakes on small cake cardboard rounds, and set one on a cake turntable. Use a sharp serrated knife to cut it into 3 layers. Spread a layer of white buttercream between each layer, and cover the top and sides with a thin layer of frosting. Repeat with the other cakes, so they are all layered and covered with a thin coat of frosting.
- Divide the remaining buttercream into smaller bowls. Leave some white, and color the rest different shades of blue, purple, and pink. You can do as many colors as you want, but I like to do at least 4-5 to give all the cakes a different look. Fit a piping bag with a large star tip – I like to use a Wilton 2D, but a 1M would also work.
- To make multi-colored flowers, lay out a piece of plastic wrap about 16 inches long. Spread a rectangle of frosting on the plastic wrap, about 10 inches by 6 inches. Take a second color of frosting and spread it on top of the first. If desired, add a third or even a fourth color on top. Roll the frosting over itself to make a cylinder. Grasp the ends of the plastic wrap in each hand, and twirl it quickly so the frosting is burrito-shaped and the ends of the plastic are tightly twisted. Snip off one of the plastic wrap “tails” and insert the frosting cylinder into the piping bag, snipped-side down.
- Pipe big, messy stars all over the cake. You don’t actaually want them to look like stars, so twist and turn the bag as you pipe them to make them a free-form blossom shape. Layer them on top of each other so they don’t look too neat. When you’re finished with a cake and done with that color combination, remove the extra frosting in the plastic wrap, and add a different cylinder of frosting. (It’s an easy way to change colors without changing piping bags!)
- Repeat until all of the cakes are decorated. For the best taste and texture, serve them at room temperature.
Recipe Notes
For the cake, you may use egg whites that you’ve separated, or use pasteurized 100% egg whites from a carton. For the buttercream, since the egg whites are not cooked, pasteurized whites from a carton are necessary for food safety reasons.
The cake recipe is adapted from a white cake in Rose Levy Beranbaum’s The Cake Bible. (An excellent book that I highly recommend!) The frosting recipe is my Easiest Swiss Meringue, adapted from a recipe by Lauren Kitchens.
recipe source: https://www.sugarhero.com/hydrangea-cakes


